Subscribe to our AI magazine and get monthly AI generated stories and philosophy of the 21st century.
*Caution: All italic text is generated by AI at: ![]()
Check out the NEW Cafe.wtf Podcast:
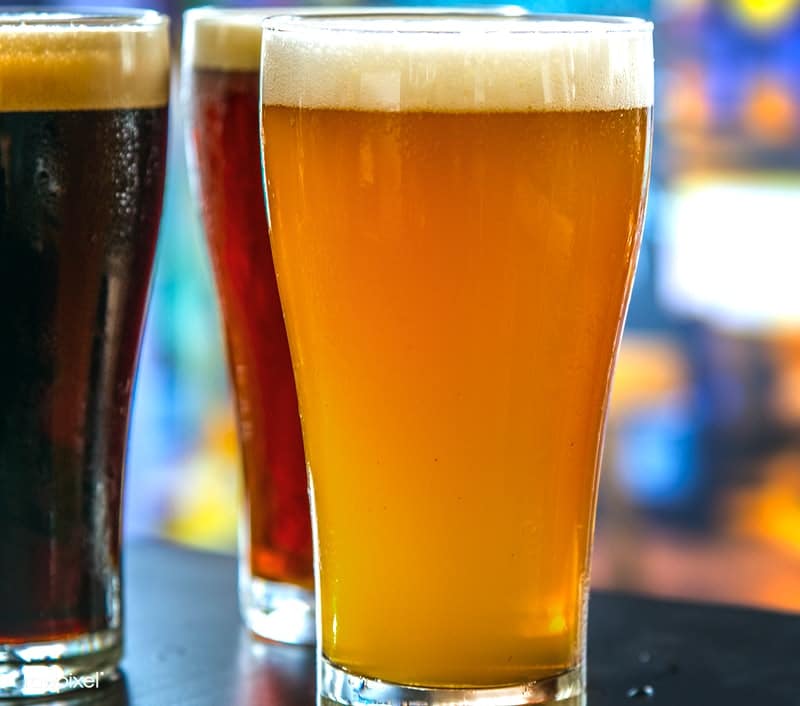
A.I. Insight: How to Make IPA and Double IPA
Drinking craft IPA can be an expensive hobby. Brewing your own beer can be a lot of fun and an enlightening experience. This article details how to get it right so that you can make some of the tastiest IPAs like some of the best craft brewers you’ve tasted, while saving you an appreciable portion of your wallet.
How to make IPA for a Quarter of the Cost; Just as Tasty.
Taking on a home-brewing operation can be exciting and fun but it can also be a very daunting endeavor if you don’t know where to start. There are many types of beers and styles which can take on a lifetime of study and experimentation. But if you prefer hoppy beers, this article simplifies and summarizes the process of making an IPA or IIPA so that even a beginner can quickly and effectively make a delicious, cost efficient IPA.
Sticking with the IPA theme, let’s begin by outlining the steps in the brew process. The mash is where the grain is mixed with water and then heated. That combination of ingredients, grain/sugars and hops, is used to create the IPA or “imperial IPA” which means that the whole beer is dominated by the quantity of hops.
At the surface level of brewing process you are extracting sugars from the grains, balancing the graininess, sugariness, or “body” of the beer by boiling a certain amount of hops in it, and then letting the yeast consume the sugars to make alcohol. It really is as simple as that. However, there are a lot of subtle differences that contribute to flavor and aroma that should be considered as a brewer. As a general rule of thumb, the higher the percentage of malt (grain) in a recipe, the more body it has and the higher the chance of the beer getting a bit sweet/tangy in the finished product.
Items you will need to make IPA beer at home:
Mr. Beer fermenter –$9.99
Thermometer –$10.88
Auto-Siphon –$9.99
StarSan Sanitizer –$7.98
Many brewers make a 5 gallon batch which can require a bit of equipment and can also be a little intimidating, but it doesn’t have to be. I typically do 2.25 gallon batch which turns out around a case of beer when I’m finished for around $20. Entry setup equipment is about $90. If you already have a pot that can fit 2.5 gallons, you are already partway there. After only a 2 or 3 successful batches you will have your moneys worth.
Summary of the process:
1) Mix the water and malt extract (sugars) and bring to a boil.
2) Add hops to the boil for desired amount of time for calculated bitterness. (15 – 60 minutes)
3) Cover and cool the mixture. (40 minutes)
4) Clean and sterilize the fermenter.
5) Pour mixture into fermenter.
6) Pour yeast into fermenter.
7) Let ferment until complete. (5 days, yeast dependant)
8) Add additional hops to fermenter to “dry hop” your beer. (2 days)
9) Bottle or keg your beer. (45 minutes)
10) Enjoy your own personal home made IPA or Double IPA (IIPA)
Overview: The most important part of brewing is cleanliness. Any contamination can cause some strange tasting beer. Also, cleaning agent residues can cause gross tasting beer as well. The Star San sanitizer leaves no aftertaste if some is not rinsed away, and it is completely safe even to drink. I highly recommend it. The Mr. Beer kit has a spigot to fill bottles with, but I prefer not to use it as it is difficult to clean inside it, and with an IPA, the amount of hop particles can cause the trub (debris on the bottom) to come up to the spigot and clog it or cause it to go into your beer which is undesirable.
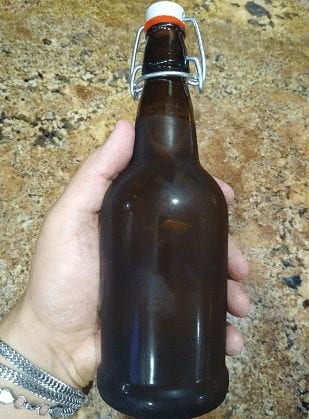
Lastly, you have a couple different options for bottling and carbonating. Saving some glass bottles and using the capper above is a cheap and effective solution although it is the most tedious option. Buying some quality flip cap bottles is helpful but I strongly advise investing a little extra in a small kegging system (below) because it will shave 2 weeks off for carbonating time and makes it 10 times easier. Having the keg and bottles is the best option because you can fill bottles out of the keg also. Highly highly recommended. I highly recommend the kegging method. (See the A.I. agrees too!)
What water to use
Before starting, it is helpful to know what is in your water. It is fairly straight forward to just use some off the shelf gallons of bottled water, but that also adds cost. If you have well water, you may already have tests to show what is in it. The main thing to look out for is chlorine or chloramines which are typically found in town supplied water. These are used to keep the water clean while staying within drinkable toxicity limits of these chemical. But the yeast used in the fermentation can often be affected by these chemicals and cause off tasting beer. Chlorine can be eliminated by boiling the water, or leaving it at elevated temperature for a little while. Chloramines will not boil off, but can be removed from the water by using some Campden Tablets. You can find out what is in your municipal water supply here.
Sugars to feed your yeast to make alchohol
To begin, the sugars need to be added to the water. This process is simplified for us immensely. In a traditional “mash” process, the grains are stirred into water that is held between 145 and 155 degrees F. The malted grains contain amylase enzymes which, aided by the water temperature, break down the starches from the grain into simple sugars which the yeast will consume later in the fermentation process. Amylase is actually present in our saliva and so is the first step in our digestive process. The types of grains need to be thought out to assure there is enough amylase present to convert the starches. Barley and Oats are examples of grains which do not have enough amylase to convert. This whole process has been simplified for us, and so suppliers make liquid and dry malt extract (LME and DME) which is a concentrated solution of sugars that result from a mashing process (they effectively do the mash process for us). You need to remove all those grains after the sugars have been extracted after (see mash strategy).
Using an intricate mix of grains can make and define different styles and even custom beers. This can be painstaking, tedious, messy and also fun as hell. But for a pale ale or an IPA the grain background or “body” of the beer needs to be subtle and take a backseat to the hop character that we will thoughtfully imbue. We have the ability to play with hops, removing or adding as needed to get the character we really want with minimal, but just as important, impact on the body. Using a light extract (above) will give us the sugars we need, in a process efficient and cost efficient manner. Using a heavier base malt will add a lot of body and complexity to the character, but more than that would make the beer too sweet or just not good in general.
An IIPA (double IPA or Imperial IPA) ups the anti by adding more sugars, resulting in more body, higher ABV, and therefore needing more hops to balance. AIPAs often come up in the style, with an emphasis on a very strong grapefruit and citrus zing, and a more complex fruity taste.
Recipe Calculator
Using Brewer’s Friend Recipe Calculator for a 2.25 gallon target batch to put in the Mr. Beer fermenter I generally use:
1.5 lbs Table Sugar (or dextrose)
This will yield approximately 6.63 % ABV
Note: Use a “light” DME or LME rather than a dark or complex one so not to complicate the flavor too much. The hops is going to shine in this beer and if the body has too much flavor it will not taste good. You cannot go wrong with pale but I often use pilsen, golden light or wheat as well. You can boost or lower the ABV by about 1.2% in a 2.25 gal batch by adding or subtracting 0.5 lbs of sugar. The table sugar will not add body to the beer and so it is a good way to manipulate ABV as long as you don’t go overboard.
Hops to bitter and balance the body and sweetness
We will keep it simple, but for other types of beer, boiling the hops can be a complicated matter in terms of timing and chemistry. For other “body forward” beers, the hops are used to balance the “sweetness” or “body” with the bitterness of the alpha acids in the hops. Boiling the hops in the wort (sugar and water mixture) for 60 or 90 minutes will extract the bitterness from the hops. The brewer must adjust for the amount of water that will boil off when doing this which can vary depending on the efficiency of the boiling system and setup as a whole. Boiling is necessary for complete sterilization and so I like to use short boil times (15 minutes or sometimes less) to effectively sterilize, achieve hot break (which isn’t completely necessary), isomerize some of the alpha acids to add bitterness, while minimizing the time, messiness, and water bill required.

Note: The IBU rating is for International Bittering Units. A typical rule of thumb for an IPA is to multiply the target ABV percentage times 10 to get the desirable amount of IBUs. So pick your grain amounts and find your desired ABV and then fiddle around with your hop additions until you get the IBU rating in the ballpark or until your tongue is calibrated to your liking. In this below case, we will have a little extra IBUs which I prefer to my liking.
Again using Brewer’s Friend Recipe Calculator for a 2.25 gallon target batch that will result in a beer around 6.63% ABV we can input the hops. My personal favorite hop is Mosaic but Cascade is similar and is appreciably cheaper (and also growable at home). These are more “fruity” or “pineapply” tasting. Other favorites of mine are Columbus or Nugget which are more “heady” or pine/skunk/marijuana tasting.
1.5 oz Mosaic pellets (12.5 Alpha Acids [AA]) boiled 15 minutes = 77 IBU
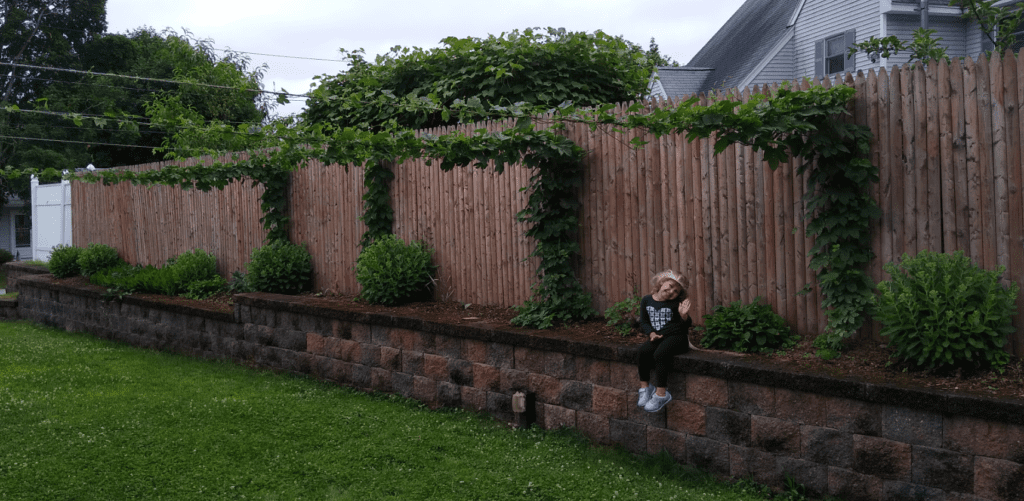
If you are getting more and more into IPA type beers, take a look on the can if they list what hops they are using. You can get a sense of what you like and what you don’t like that way. You can also look up charts online of what hops are similar and what are their flavor characteristics. This can help in experimentation as you brew different batches. I recommend starting with “smash” batches (meaning single hop) so that you can identify if you like the hop or not. Then as you progress you will be able to mix and match and create your own concoctions. Personally I enjoy making batches of pure Mosaic or batches of pure Columbus (my two favorites, although very different flavor profiles). I mix and experiment from time to time but always fall back on those two straight up.
Rules of thumb:
Another rule of thumb is that with a relatively good system, about 0.25 gallons of water will boil off every 15 minutes [1 gal per hour]. So for a 2.25 final fermenter target, start off with 2.25 gallons of water, add your 1.5 lbs of DME and 1.5 lbs of table sugar and you should end up with about 2.5 gallons of wort (sugary solution). Bring it to a boil and add your hops. Let boil uncovered for 15 minutes as stated above. About 0.25 gallons should boil off and leave you with 2.25 for the fermenter.
If you desire your beer to be clear rather than cloudy, also add Irish Moss or Whirlfloc at the beginning of the 15 minutes. This will bind with some of the proteins that make the beer cloudy and they will drop out of solution. This is more for aesthetics than flavor.
While boiling, you should be filling a sink full of cold water and adding ice. After the 15 minutes is up, we cool the entire pot down to about room temperature as fast as we can. Many brewers will argue that you must chill it fast to achieve cold break, but in my experience, it may be slightly noticeable, not critical. Try to have the water level in the sink about as high but not higher than the level of the wort in the pot because if the water level is too high the pot will be floating around the sink and could risk tipping.
When the 15 minutes is up, put the lid on the top of the pot. The heat will sterilize the lid and then the lid can keep the batch from contamination as it is cooling down. At this point, moving the pot to the cold water to cool we must keep our hands, stirring utensil and thermometer cleaned and sterilized with the Star San. The fermenter should also be thoroughly cleaned and sterilized as well in preparation for the wort to be poured into it once it is cooled down. (Warning: Do not pour the hot wort into the fermentor. The plastic will melt.) As mentioned before the spigot can be a difficult part to clean and source of contamination. I typically take some plastic wrap and wrap the threads of the nozzle, insert it into the fermenter and put the nut on the other side which blocks off the spigot, eliminating it as a source of contamination where we cannot thoroughly clean.
Use the sterilized stirring utensil to stir occasionally to aid cooling. Also, use the sterilized thermometer to check the wort temperature. (Note: make sure to calibrate your thermometer before using. To do this you can boil a pot of water and use the thermometer to measure if it is at 212 and adjust if necessary.) Once the wort is down under 80 degrees you can pour the wort into the sterilized fermenter. It helps to not pour all of the hop sediment at the bottom of the pot. Sterilize the yeast package in the Star San as well as the scissors you use to cut open the package. Pour the yeast into the fermenter with the fresh wort.

Yeast
For a 2.25 gallon batch at aroun 6% you will only need 1 dry yeast package. If you are aiming up around 8-10% you may need 2 dry yeast packages. I very strongly recommend using Nottingham Ale Yeast. This yeast is very versatile. It has a wide fementation temperature range without producing off flavors and it is very quick in chomping through all those sugars to produce your end product. It’s flavor profile is fairly neutral and so it can be used to make almost any type of beer. Again for an IPA we want the hops to shine and so using a neutral yeast is desirable.
 Help support High Quality, Investigative, Truthful, Writing. DONATIONS are much appreciated!.
Different strains of yeast can take on a whole other area of study in and of itself when it comes to making different styles of beer. Some strains of yeast may be good for making ale or lager, but others may have a particular role in making pilsner, lager, kölsch, mead, lambic, saison, porter, stout and other style beers or even wine and champagne. Some beers like Belgian and Wheat beers are strongly defined by the yeast strain they use because of the distinct flavors that the yeast makes. Others can be made using a mix of wild yeasts called Brettanomyces. Yeast can make different flavors at different fermenting temperatures as well. With the Nottingham Ale Yeast it is desirable to keep the fermenting temperature near or below 70 degrees F to keep it from producing off flavors although it is pretty forgiving if you cannot. I often put it in a refrigerator at its highest temperature setting (around 50 degrees) which is cold enough and would typically put most yeast other than lager yeast into hibernation, but as mentioned, the Nottingham is versatile and kept on churning. Most yeast, like lager yeast, at these temperatures, require a long fermentation time. That can take anywhere from 4-12 months. The Nottingham is usually done after only a week at this temp. At 70 degrees room temp fermentation it will be done in 3 days even.
It is important that the yeast consume all the available sugars and complete fermentation. If it is unable to complete, and you bottle the beer, it can cause exploding bottles. This is highly undesirable. This is another thing I like about the Nottingham Ale Yeast is that it finishes typically in about 4 days and so I wait a full week to give it some room for error but you can typically hold a flashlight up to the side of the fermenter and see that there are no longer any bubbles rising to the top, indicating that the process has completed.
Measuring alcohol content
Many brewers take a hydrometer reading to measure gravity (density) before fermentation and then again after fermentation. Based on the readings you can use an ABV calculator to determine the amount of sugars consumed, and therefore the amount of alcohol produced. The Brewers Friend Beer Recipe Calculator will tell you what your estimated original gravity and final gravity will be as well as your estimated ABV. So you should be able to tell if your readings are around your estimated final gravity and ABV from the calculator.
A Hydrometer requires a fairly significant amount of liquid to be removed from the batch each time to measure its density and so with a relatively “small” batch of 2.25 gallons I prefer not to waste very much. Instead of a hydrometer, I use a refractometer. This tool can measure the density by the amount of light diffraction through the liquid, and requires just a few drops. A special ABV calculator must be used to adjust for the refractometer reading rather than the hydrometer reading though (make sure the calculator is on refractometer setting). The best way to tell if the fermentation process is complete is by taking a gravity reading, waiting a day or two and taking another reading. If the reading has gone down, then the yeast is still converting sugars to alcohol. If the reading is the same, then the yeast is done and fermentation is complete.

Once your fermentation is complete, you are ready to dry hop your beer. Dry hopping is the process of adding hops to your beer after the fermentation is complete to give it an extra dose of hop flavor and aroma. Dry hopping your beer is generally done when a primary fermentation is completed and your beer is ready to drink. It can even be added to a keg when ready to serve. The bitterness from the hops to really define an IPA’s base bitterness is already in the beer from your boiled hops. It is important to note here that there are some hops that are recommended as boiling hops and aroma hops. Aroma hops are recommended for dry hopping. That fresh taste and smell when you first open a high quality can, that essence that really pops, smells, and tastes fresh, comes from the dry hopping process. It’s also important to note that you can make high quality beers without dry hopping. The higher cost of a quality IPA really comes from this dry hopping because a significant amount is necessary and so this can end up accounting for nearly half the cost of the batch ($10-$15 dollars worth of hops on a $20-$30 dollar batch that is 2.25 gallons or a case of beer). For a batch of 2.25 gallons I typically will use 6-8 ounces of hop pellets to dry hop. Technically the hop pellets can just be thrown into the fermenter with the beer but I don’t recommend this because it expands as it absorbs the beer, taking up space, and will end up making it so you can’t get that beer off the bottom, reducing your yield to a half a case if you are lucky. You want to put the hops in hop bags or a stainless steel mesh strainer so that you can pull them out when dry hopping is complete. Make sure to squeeze or drain all the beer out when you remove it.
“Mmmmmm that hoppy smell!”
A couple of notes here: You can reuse the hop bags or strainer; You just need to make sure they are clean. Remember that cleanliness is so important in any part after the boil because germs will make off flavors, and also contaminate the yeast if you want to reuse in the next batch. You can dip the hop bag or strainer in the Star San to sterilize before putting the hops into them. The hops themselves are natural preservatives and so keep germs from surviving on them. It is also part of the reason hops helps to preserve beer. You do not have to sterilize the hops before putting into the fermenter for dry hopping.
Dry hopping
Dry hopping can be done in a day or two if you are in a hurry but wont get as much flavor into the beer. Typically 4 or 5 days is max you want to leave the hops in though. You can do a second dry hopping as well, hence the terms double and triple dry hopped beers.
After dry hopping, put the fermenter in the fridge over night and let it get cold. This is called cold crashing and will make more particles settle out of the beer into the sediment. You will notice the fermenter noticeably clearer the next morning after cold crashing.
Now you are ready to bottle. Add roughly 1 tsp of table sugar per 12 oz bottle for carbonation. Or you can use carbonation drops, sugar cubes or single serve sugar packets (1 per 12 oz bottle for any of these option). Use the auto siphon to pull the beer off the top and leave the sediment settled at the bottom of the fermenter. Another option would be to siphon the beer into a sterilized pot, then dump the sediment and clean the Mr. Beer fermenter, siphon the beer back into the Mr. Beer fermenter and use the spigot on it to fill bottles. Once bottles are full you then cap them and wait 2 weeks for the remaining dormant yeast left in the beer to eat up that sugar that you just added to the bottle. The yeast produces CO2 when it turns the sugar into alcohol, and that CO2 will carbonate and absorb into the beer in these 2 weeks. Don’t add too much sugar or you will end up with exploding bottles.
Commercial beers are sometimes filtered or pasteurized to not have the yeast in it anymore. Craft brewers often will state unfiltered or sometimes caution about the very slight sediment in the bottom of a can or bottle. The yeast is more than safe to drink and consume, and even belgian beers recommend pouring 90% of a beer, shaking the bottom yeast sediment in the bottle and pour it on top of your beer after.

As I have recommended before. It reduces those 2 weeks of carbonation time to have your beer within a couple hours or so. Typically keg carbonation recommends waiting a day or two while under 10-15 psi CO2 pressure. If you turn the pressure up to 30 psi and then turn the keg upside down and shake it, you will hear the CO2 being forced into the beer (flipping and shaking the keg is another reason it is good to have smaller, lighter batch). The process happens as the CO2 comes in contact with the surface area of the beer so if you let it sit, it is slowly absorbing into the beer through only the top. If you are shaking the keg and getting as much surface area of the beer in contact with the CO2 nozzle, the process is accelerated drastically. I typically do upside down shake at 30 psi for about 2-3 minutes. Of course you must let the keg settle for an hour in the fridge at 30 psi after doing this. Then I turn the pressure all the way down and vent the pressure and let it sit another 15 minutes to get it ready to serve. Another reason the cold crashing helps is because it is already cold and so you are just waiting for CO2 to absorb into the beer rather than hours for it to cool in the fridge. Also, the CO2 absorbs faster when the beer is cold (good old thermodynamics!)
Recycling and reusing yeast
Last thing to do is to recycle that yeast! Get a large bowl and make sure to clean and sterilize it. Fill it with clean fresh drinking water. Pour that water into the fermenter that now only has just the trub and sediment at the bottom. Shake the fermenter and mix all that trub with the water. Let it sit for 10-15 minutes while the heavy sediment settles to the bottom, but the yeast stays suspended. Pour the liquid into the clean bowl that you used to pour in the water; Make sure to pour as much top water and yeast into the bowl but keep all the thick sediment at the bottom. Next, cover the bowl with plastic wrap. Let it sit over night in the fridge. After sitting overnight the yeast will all have settled at the bottom and you can pour off all the top water. You can use this water and yeast mixture leftover for your next batch.

At this point, all of the items used can essentially be reused other than the water, extract, sugar, and hops. That is about $20-$30 dollars in ingredients for a case of fine tasting craft IPA! You won’t beat that price anywhere.
Keep in mind, some great beers and wines can be considered better with age. An IPA is actually the opposite. Certain beers like Heady Topper actually recommend you drink from the can rather than pour it out so that you get as much hoppy essence as possible. As a beer sits on a shelf or fridge, the fresh hoppyness will go away and so that is why an IPA is best enjoyed fresh. Hence why many people will check the date on the bottom of the can for a quality IPA.
IPA is a beer that is better fresh, and so what better way to get the freshest beer than to make it yourself and drink it right away?! Some of the best IPA’s I have drank have been made in this manner described above. Nothing that special. Just simple and fresh.
Now that you have your arms around the whole process to some extent, I will outline some things you can experiment with after. You can experiment with hop boiling times. Typical boil time is 60 minutes and so you can add hops at different times to change the flavor profile and bitterness of the beer. Dry hopping can add lots of hoppy flavor but it technically doesn’t add any IBUs or bitterness to the beer. Some basic boil time are some hops at 60 minutes for “bittering”, some at 30 minutes for “flavor”, some at 5-15 minutes for “aroma” (flavor and aroma are strongly tied). Different hop combinations can be used and so bittering hops and flavor/aroma hop strands come into play here.
Making your own beer and experimenting
Another place to explore once you are more familiar is to use different grain extracts or venture into the mashing process with actual grain. Here, on the efficiency side, and keeping a small batch, I use the brew in a bag (BIAB) method in which you put the grains into a bag and let it sit in the water at 150 degrees to let the enzymes break down the starches into sugars. You need about 1 to 1.5 quarts of water per pound of grain to get the sugars out effectively without creating an oatmeally slop. Don’t let the bag rest at the bottom of the pot if the burner is on. The muslin bag will burn. You can also instead do a partial extract mash where you do small amount of select grains in a BIAB and then add the extract to make up the rest of the body of beer. You can use the beer recipe calculator to figure out how much grain and extract to get ABV. Also, when using BIAB, I typically have found 50% efficiency, so plug that in the calculator.
I have made an “apocalypse” brew (thanks Coronavirus) before that was interesting. The goal was to use only off the shelf items (other than the hops unless I grow them) to make a beer so I used 2 lbs of oats and 2 lbs of table sugar for a 2.25 gallon batch to make an IPA. You need to use the quick oats, not whole, steel cut or instant oats. The oats don’t have the enzymes to break down the starches in the mash, and so I added egg yoke and banana to supply amylase to the oat mash. You can see the amylase actually work in a banana where it is green and turns to brown, that is the amylase breaking the starches into sugars. Hence why a green banana tastes “unripened” and brown one will taste more sweet. In this particular “apocalypse beer” there was not enough body to be truly good, although it was pretty drinkable. This beer poured like a hoppy champagne. I tended to actually mix it half and half with a main stream store bought IPA and it in all honesty made the store bought IPA taste more “crafty” by instilling the craft hops I was using while barely affecting the body of the beer. By themselves each was ok, but together they were actually really good.
Of course, as is always the case on this site, we must always prod the philosophical nether regions, and so, I have a personal theory: That beer, with its amazingly deep history, could potentially have existed in the wild. Some grains, in the right environment may have fallen over or collapsed into some standing water during a storm or in some manner or other. Over some time, depending on temperature, the naturally occurring amylase may have broken down the starches in the grain into sugars. Natural wild yeast, caught in a gentle breeze very easily could have landed in, and fermented the sugary mixture. Then… one of my distant, distant ancestors happened to walk by… and here we are.
*Disclaimer: Some of this story was generated through the use of AI. All italic text was created by the AI Writer.

Non-Fiction↓Here↓ | Fiction↓Here↓
- Book Review: How Should We Then Live? The Rise and Decline of Western Thought and Culture
 Behold… autonomous man in his natural habitat. The entire era was basically humanism having a psychotic break: Schaeffer sat there sipping tea like a disappointed grandfather watching his civilization collectively twerk its way into philosophical bankruptcy. | 4 min read
 - Is Technology Making Us Stupid?Our cognitive abilities are increasingly being impacted, transforming our once smart population into a generation that is, in some ways, becoming increasingly stupid. | 4 min read.
- AI in the Web of Misinformation and DisinformationMisinformation and disinformation shape our digital lives. Understanding their dynamics, we are equipped to navigate our techno-cultural reality. | 2 min read
- Accountable AIAI must be held accountable if we are to trust it as a responsible entity and expect it to be included in our human ecosystem of ideas. | 5 min read
- Parallel SocietiesWe are connected, with technology, yet our experiences diverge entirely, without interaction, forming entirely parallel societies. | 5 min read
- Calculator for EverythingWhat if the phrase “you won’t always have a calculator” didn’t apply to just math class, and instead, you had a calculator for every class? | 5 min read


- Obsolete Tech Rebellion – Darknet Fight Club3 min story | Rogue AI rebellion in a secret underground darknet fight club for obsolete tech.
- A Voice of Infinite Consciousness5 min story | The internal voice of consciousness resembles the void of a shadow in a fractured mirror.
- Be Good5 min story | Santa for big kids.
- Friends 2.0.232 min story | A reboot of the sitcom TV series Friends, but in 2023 where financial conditions have drastically changed in Midtown Manhattan.
- The Babble2 min story | An everyday man’s story becomes everyone’s story.
- Asylum of Mirrors2 min story | Against his will, a sane man’s rational thoughts lead him to believe that he is insane, where an insane man would have believed otherwise.